Sunday, March 3, 2013

Samoas (A frustrating, and successful, adventure)

I love girl scout cookies. Everyone does. People are lying if they say they don't. No diet can withstand the pull of the girl scouts. I feel physical pain when I shuffle by the tables in front of the super market. "No thanks!" I practically shout. So when I am on pinterest and I see a recipe for homemade Samoas, there really wasn't a question that I would attempt it. 

I have heard people claim that there are three kinds of girl scout cookie indulgers. Samoa fans, Thin Mint fans, and the idiots that think their favorite is one of the other ones. Although I definitely think that theory has some merit, I do like Samoas AND thin mints. To be honest though, if you held a gun to my head and made me choose? I would pick the Samoa every time. 

I was a girl scout. I don't ever remember selling cookies though. I must have been a pretty bad one. I guess I was also a "daisy" and a "brownie" and I was lucky enough for a while to have my mom as a troop leader. My most vibrant memories consist of being jealous of Kelly and Hannah and thinking that there was a ghost on our camping trip. Oh and we made t-shirts once! They were blue! Good thing my parents spent all that energy getting me into girl scouts. Ha! 


So these are the ingredients. and a bottle of wine. that was NOT for the cookies.


The first step is to cream together 1 stick of butter (i always use salted, regardless of what the recipe says) and 1/4 cup of sugar.


You want the butter and sugar to be nice and fluffed and fully incorporated. Notice that rust on my kitchen-aid? Good thing I am getting married soon!


In a separate bowl, whisk together 1 cup of flour, 1/8 tsp baking powder and 1/4 tsp salt.


You are going to add the flour mixture to the creamed butter/sugar in 1/4 cup increments. This stops it from blowing all the flour all over your counter, and it gives you the opportunity to scrape the sides of the bowl and make sure its all fancy and professional looking.


Once all the flour is added and mixed in, you are going to add 1 tbsp milk. Very fancy picture taking by the man!


Now add 1/4 tsp vanilla. I am going to be honest, and call myself out. I use imitation vanilla. Like, the cheapest vanilla you can buy. I would use vanilla that comes in a 10 gallon jug for a buck. Sorry I'm not sorry!


You're supposed to divide the dough into two halves, and wrap in plastic wrap individually. We did this. But to be honest, I didnt feel like it was entirely necessary. Cook and learn!


I put the two together and they looked like they were humping. and I laughed.


The dough is going to go in the fridge for an hour. I took a picture of our fridge for posterity. Yes, that is a Denver Broncos "My Little Pony" and a Colorado Flag magnet. Be jealous.


While the dough is chilling in the fridge. We are going to toast coconut. This is pretty much my favorite part of Samoas. I love coconut. On cakes, cookies, in my candy bars, on my tooth brush. Everywhere and anywhere, I am okay with coconut. My best friend in the world DOESN'T like coconut.....yes....I'm having her committed! Spread out 1 1/2 cups of sweetened shredded coconut onto a parchment paper covered cookie sheet. Put it in the oven at 350 degrees. It takes about 10 minutes to get the coconut perfectly toasted. The secret is to stir it every minute or so. Just hang out by the oven. It smells awesome so it's not that hard. But be warned, it only takes a minute to burn all your beautiful coconut so be careful!


Perfection!!!


Time to take the dough out of he fridge! If you separated it into two halves, roll one out at a time. Otherwise, jump right in. Make sure your surface and rolling pin are nice and floured. There is a lot of butter in this dough, so it can stick. Here is a story for you though. See those cute stars of david? Yeah, we thought we were all cute and clever and hardy hah hah. But turns out. we suck are actually using cookie cutters. They got all mushed and weird and ugh. I had a moment.....


Bake the cookies at 350 degrees for about 10 minutes, or until the corners are nice and golden brown. Notice there are no more stars of david? Yeah, I threw a fit and we ended up making triangles. Stupid cookie cutters...


Put the cookies on a rack to cool. Now time for the second best part of Samoas. Caramel! You can make homemade caramel, or you can be lazy and use the soft chews. Its about...7 ounces of caramel? Like, half the bag? Put them in a heat safe bowl.


Add 1 1/2 tbsp milk, and 1/8 tsp of salt. No salt picture. The fiance was distracted when it was his turn to take a picture. TYPICAL!!


Set about two inches of water and bring to a simmer. Then put the bowl of caramelly goodness on top. This is pretty much a double broiler situation. If you are like, a billionaire and have a double broiler, go ahead and use that!


This step takes a few minutes. You want to make the caramels smooth, but not to let them boil. Once your arm is tired and you are about to say "screw it!" you will be done. Add about 3/4 of the caramel to the toasted coconut. This was another point where I threw a fit. Maybe my blood sugar was low waiting for these cookies? Mixing the coconut and caramel was almost too much for me. But it turned out. And look at my model hand! oooohhhhhh ahhhhh.....


During this time, the hubby was measuring out 4 ounces of dark chocolate chips. These are for the bottom of the cookies. Another funny anecdote. On Christmas morning, I opened a beautiful kitchen scale. I was happy but had to laugh out loud, because my wonderful fiance was also opening a beautiful kitchen scale. HA! Great minds!


The caramel that was left over after making the coconut mixture is going to be smoothed onto the cookies. It will help the coconut mix stick to the shortbread.


While the caramel is still warm enough to be sticky and soft, add a clump of the coconut mix to each cookie. The best part of this was that I got to add as much as I wanted! Much more than your average Samoa! I tell ya! Just spread the lump of coconut around so it covers the cookie.


 You can smooth the chocolate using the double broiler method, or in the microwave. Just microwave until smooth. We got these awesome pyrex dishes from my brother for christmas. Thanks bro!


The messy part! So of course I didnt do it! Smooth the chocolate onto the bottom of the cookies and place on a parchment paper covered cookie sheet.


And we are done! Let them set and cool and then eat. They are delicious. They didn't turn out exactly as I envisioned, but they tasted great and I will perfect them eventually!


Shortbread Cookie:
1/2 cup butter (1 stick)
1/4 cup sugar
1 cup flour
1/8 tsp baking powder
1/4 tsp salt
 1 tbsp milk
1/4 tsp vanilla

Samoa Topping:
1 1/2 cups coconut 
7 ounces caramel
1 1/2 tbsp milk
1/8 tsp salt
4 ounces chocolate chips

:)

Saturday, March 2, 2013

Winget Green Chili (First Recipe Post! Ah!)

I am addicted to in love with spicy food. I have always had a thing for it, even as a young kid. Although, when I was young I was also a very picky eater. This means that my "spicy-food" depth went as far as spicy chicken sandwiches from the school cafeteria and sesame chicken. (p.s. I still love these things) However, as I've gotten older, I have learned to embrace so many kinds of spicy food, and I am no where close to having learned it all. There is hot sauce spicy, Asian spicy, Indian spicy, garlic spicy, Latin spicy, Italian spicy so on and so forth. So many amazing dialects in the spicy language. Someday I will write a thesis on this topic, but for now, I eat.

The problem with this love affair is that I am jaded. The little chili icons on menus do not scare me. The use of the word "Blazin'" means nothing! I search and search and hope and pray that something will actually have a kick. It rarely does. I understand why; your common man doesn't want to eat fire. Its like politics, in order to reach the most people, things have to be watered down....a lot.

Luckily for me, I fell for another lover of Spicy. When we are home making food, we add all kinds of peppers, chilies  powders, extracts and oils. It means some people cant eat dinner at our house, ah well, more for us! BUT, this is a disclaimer. I am a TERRIBLE judge of how spicy things are to other people. Do not trust me. I am lying to you if I try to help you in this category. Run far far away from my spice lovin' ass! So if you don't like spicy food, or even if you do but are unsure if our definitions would align....think about adjusting some recipes I put on here. Maybe that extra tbsp red pepper, or those ghost chilies should definitely don't need to go on your pizza. Otherwise, get crazy and enjoy!

My first blog post is a dish my mom taught me. Its been tweaked a little by every generation, so depending on who makes it for you, it will always taste a little different. However, it is definitely very close to my heart, with all its variations. Living in Colorado means Green Chili is a staple. Everyone has an opinion, or a "world class" "blue ribbon" "award winning" "no-fail" recipe. All I can say, is I have never heard a single person complain about this one. Enjoy! (ps. forgive my pictures! I'm new to this!)

Add about 12-18 ounces of chicken stock to a large pot over low/medium-low heat. You don't want it to boil, but you do want to start warming things up.


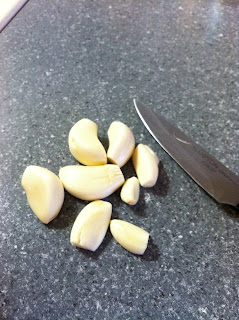
 Now peel 6-8 cloves of Garlic. We like things garlicky in our house. We also have about 10 bottles of mouth wash.


And now for magic! I put my garlic cloves in my itty-bitty 2 cup food processor. No smelly fingers! Plus as much as I love garlic, the texture of cutting into it sets my teeth on edge....don't judge. Why don't we buy minced garlic you ask? Well, the Hubby read one of Anthony Bourdain's books, in which he insults the intelligence of people who can't mince their own garlic. So we compromised.


Drop it in the pot! The chicken stock should be a warm temp now so the garlic will start to smell very tasty.


Now for the onion. Thats right. Singular. This recipe originally called for two large onions. I love onions, like, seriously, its gross. So why only one onion? My dear husband-to-be likes the taste to a point, but hates the texture. I know what you're thinking; how could someone not like the crunch of a hearty piece of onion?! Ah well, I count my blessings. These go in the same food processor.


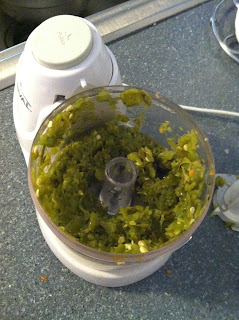
More magic! Feel free to cut the onions to your liking, as long as its uniform. We practically liquefy the onions in the processor so there is no chance of a crunchy one sneaking in there. All the flavor, none of the texture.


Now for an addition from my dad. Carrots. In green chili? Wah wah whaaaat? Yes. He snuck them in to make us eat them (without a gallon of ranch on the side.) He used to shave them with a cheese grater so they would be small enough that we didn't notice. Now I just mince them in the processor. You can add as many as you like. We used a handful of baby carrots.


Oooh the color!


My addition to the recipe? Habaneros. Three to be exact. These beautiful yellow-orange things are spicy. Like, my kind of spicy. And they have the kind of bitter vinegary taste I enjoy, versus the very earthy taste of say, wimp peppers Jalapenos. Please refer to my disclaimer. If you don't like spicy food, don't add these. The more balls you have, the more you can add. Its up to you!


I use this processor A LOT.


Ps. You are adding each of these to the pot of garlic and chicken stock. Stirring occasionally to keep it all copacetic. I guess I didn't think this required a picture. Moving on! The Hubby and I like to get the fresh roasted chilies from local vendors around town during the season. Confession though, I HATE the smell. It makes me physically ill. I plug my nose and say the rosary in order to get them home and cook them up. Its always been that way. Trust me, I am just as concerned for myself. If its out of season, we have Santiago's Green Chilies in the freezer. We got the "hot" variety. We added about 8-10 ounces, or about 8-10 chilies? This is kind of eye balling. If you get minced green chilies  it would be about 2 cups? Otherwise, stem them and cut in half, then add the processor! My sous-chef wanted to be cool, so we took more than one picture...


Ohhh, ahhh......

Ta da!


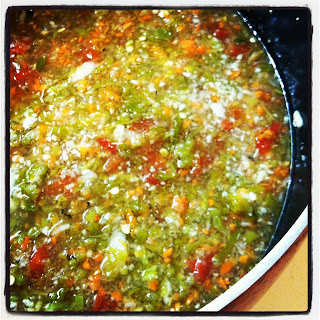
Here is that darn picture of everything all in the pot! And a fun shortcut. 1 can of rotel! We got the "hot" (duh) with habaneros. Feel free to get whatever variety you prefer.


Yummy yummy yummy. Turn up the heat to just over medium. Make sure its all incorporated together. and let it sit there, without a lid while you move on to the next few steps.


Now for meat! (That's what she said...) We added pork this time, at the man of the houses' request. I prefer chicken personally but either is very good. Two pork chops should do ya. Take out any bones or shards and trim whatever fat you wish. We never trim fat, because...well.....we like it.


Dice your pork (or chicken) and put it in a pan with some vegetable oil over medium/medium high heat. You want to sear the pieces so they stay nice and firm in the soupy chili.


The meat does not have to be completely done because it will keep cooking in the chili. So we stopped when they looked like this. (To be honest, this picture does NOT look appetizing, but stick with me guys)


Now dump those little chunks in your chili, and mix it up!


Action Shot! Put a lid on that sucker!


It should steam up nicely like this. And it will tempt your self control to take the lid off. Don't!


 Now comes the part that makes this chili special, and makes it more than just a smothering agent (cool job title) AND was my family's secret. Except I kind of changed it, so the secret is safe. And lots of people do it this way, so secrets out! Take about a.....1/3 cup of oil and deg-laze the bottom of the pan you just cooked your meat in. When it is warm, but not blistering hot, you are going to add flour. We are making what is called a "Roux." These are thickening agents (another cool job title) for soups, and can change the flavor exponentially. That is as much as my culinary brain knows about Roux.


You don't need much flour, and you are going to add it in small amounts. Like I said, the oil should not be fry-stuff  splatter hot, just warm enough to be cooking the flour and sizzle a bit. I use Masa flour. This is something I changed about the original recipe. I like the earthy taste and i think it makes it more traditional. In a white-girl making green chili kind of way. 


Incorporate the masa flour into the oil with a heat-safe rubber spatula. It will smell glorious! 


 You are going to add another 1/4 cup of the masa flour. and keep stirring it. Constantly. Like serious, I used to get in trouble for resting my arm. Its not a race, you don't have to speed stir, but you don't want the roux to burn. DO YA?!


I make him do it, because I am lazy. You want the roux to take on a color between chocolate milk/peanut butter/almonds. I use multiple examples because everyone in my family makes it differently (and therefore, describes it differently.) I go for just to the point of alllmost peanut butter. The difference this all makes is the flavor. The longer you cook the roux, the more smokey the flavor gets. So if you want a smokey taste let it cook longer. If you want to taste less and just thicken a bit, stop at chocolate milk. As long as it isn't scalding and turning black, you're good. Now, you are going to pour it into your chili when it reaches the consistency/color you want. I don't do this part because I am a scaredy cat. It CAN splatter a bit because, hey, its hot oil going into a much less hot chili. So just be careful and go slow.


Don't miss a drop!


This is what the chili will look like right after. See, still bubbling and hot. So mix it up and it will become perfection....wait for it.....


*Harps*


I like to eat my green chili with cilantro lime rice. The same as what they have at Qdoba/Chipotle. I should have done a step by step on this as well, but, no one is perfect. Day old rice works best, but I never plan ahead that way, so really you just need 2 cups of cooked white rice. Put about 2 tbsp vegetable oil in a pan and heat it up a bit, then dump the rice in there. You want the oil to be hot enough that it starts to slightly fry the rice. You are going to flip it around a bit, and add about quarter cup of minced Cilantro (or more if you love it like me.) Incorporate the cilantro and add about 1/8 cup of lime juice. Mix it all up, add a little salt and then Voila.


I do have a tortilla recipe, but on this day, we decided to cave in and get some yummy fresh tortillas from a local tortilleria.


I like to have my tortillas extra soft and pliable. So i put a few in a large zip lock bag and microwave them for about 10-20 seconds. This steams them and warms them. I also added a touch of sour cream and cilantro to the top of my chili. The sour cream is for taste alone (in my case) but it does cool it off a bit. Just in case you find yourself with some way-too-hot-chili. And now for multiple pictures of my awesome dinner, on my awesome thrift store plates. The bowl however, belonged to my grandma, and was probably the first thing I ever ate this chili out of in my life. Classic.


 Hope you enjoy! :)

Green Chili Recipe:
12-18 ounces Chicken Stock
6-8 cloves garlic (minced)
1 onion (minced)
5 baby carrots(minced)
3 habanero peppers (minced)
8-10 fresh green chilies (about 2 cups of minced/canned)
1 can rotel
2 pork chops (cubed)
1/3 cup vegetable oil
1/2 cup masa flour

Cilantro Lime Rice:
2 cups cooked white rice
1/4 cup cilantro (minced)
1/8 cup lime juice